p(1) .then((value) => { console.log("This is the first value :" + value); return p(value+1) }) .then((value) => { console.log("This is the second value :" + value); return p(value+1) }) .then((value) => { console.log("This is the third value :" + value); })
/*Output: This is the first value: 2 This is the second value: 4 This is the third value: 6 /*
p(1) .then((value => { console.log("This is the first value :" + value); return p(value) })) .then((value => { console.log("This is the second value :" + value); return p(value) })) .then((value => { console.log("This is the third value :" + value); return p(value) })) .catch((error) => { console.log(error) })
/*Output: This is the first value :2 This is the second value :3 Unexpected condition /*
整個瀏覽器的運行環境並非只由 JS 引擎組成,瀏覽器還包含許多其他的部分,像是渲染引擎(Rendering Engine)和 HTTP 請求(Http Request),而瀏覽器也提供 Web API 讓 JS 做應用,像是操作 DOM 節點 、 AJAX 請求、 setTimeout 計時、 Geolocation 地理位置。雖然 JS 引擎身是同步執行,但透過和瀏覽器的其他引擎互動來達到非同步的效果。
Call Stack
JS 的執行堆疊(call stack)記錄了 function 在 JS engine內的執行順序,意思就是程式目前執行到哪邊, call stack 是以同步的方式由上而下執行,採取後進先出 Last In, First Out (LIFO) ,最先執行的函式會被放在 stack 的最下面,如果在函式中執行了 return ,則會將該函式 pop out 出 stack 。
請參考以下範例:
1 2 3 4 5 6 7 8 9 10 11 12
functionfoo() { console.log("-> start [foo]"); console.log("<- end [foo]"); }
functionbar() { console.log("-> start [bar]"); foo() console.log("<- end [bar]"); }
bar();
以下為範例各執行階段:
bar() 會先被執行
bar() 印出 “start”
foo() 執行,此時 bar() 仍然在執行中
foo() 印出 “start”
foo() 印出 “end”
foo() 結束執行
bar() 印出 “end”
bar() 結束執行
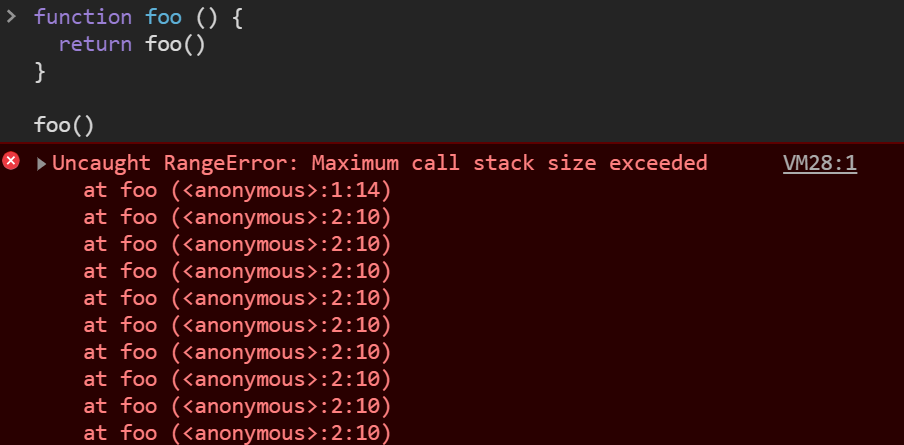
Stack Overflow
如果遞迴函式不斷呼叫自己而沒有一個中斷點,則會造成瀏覽器產生 stack error :
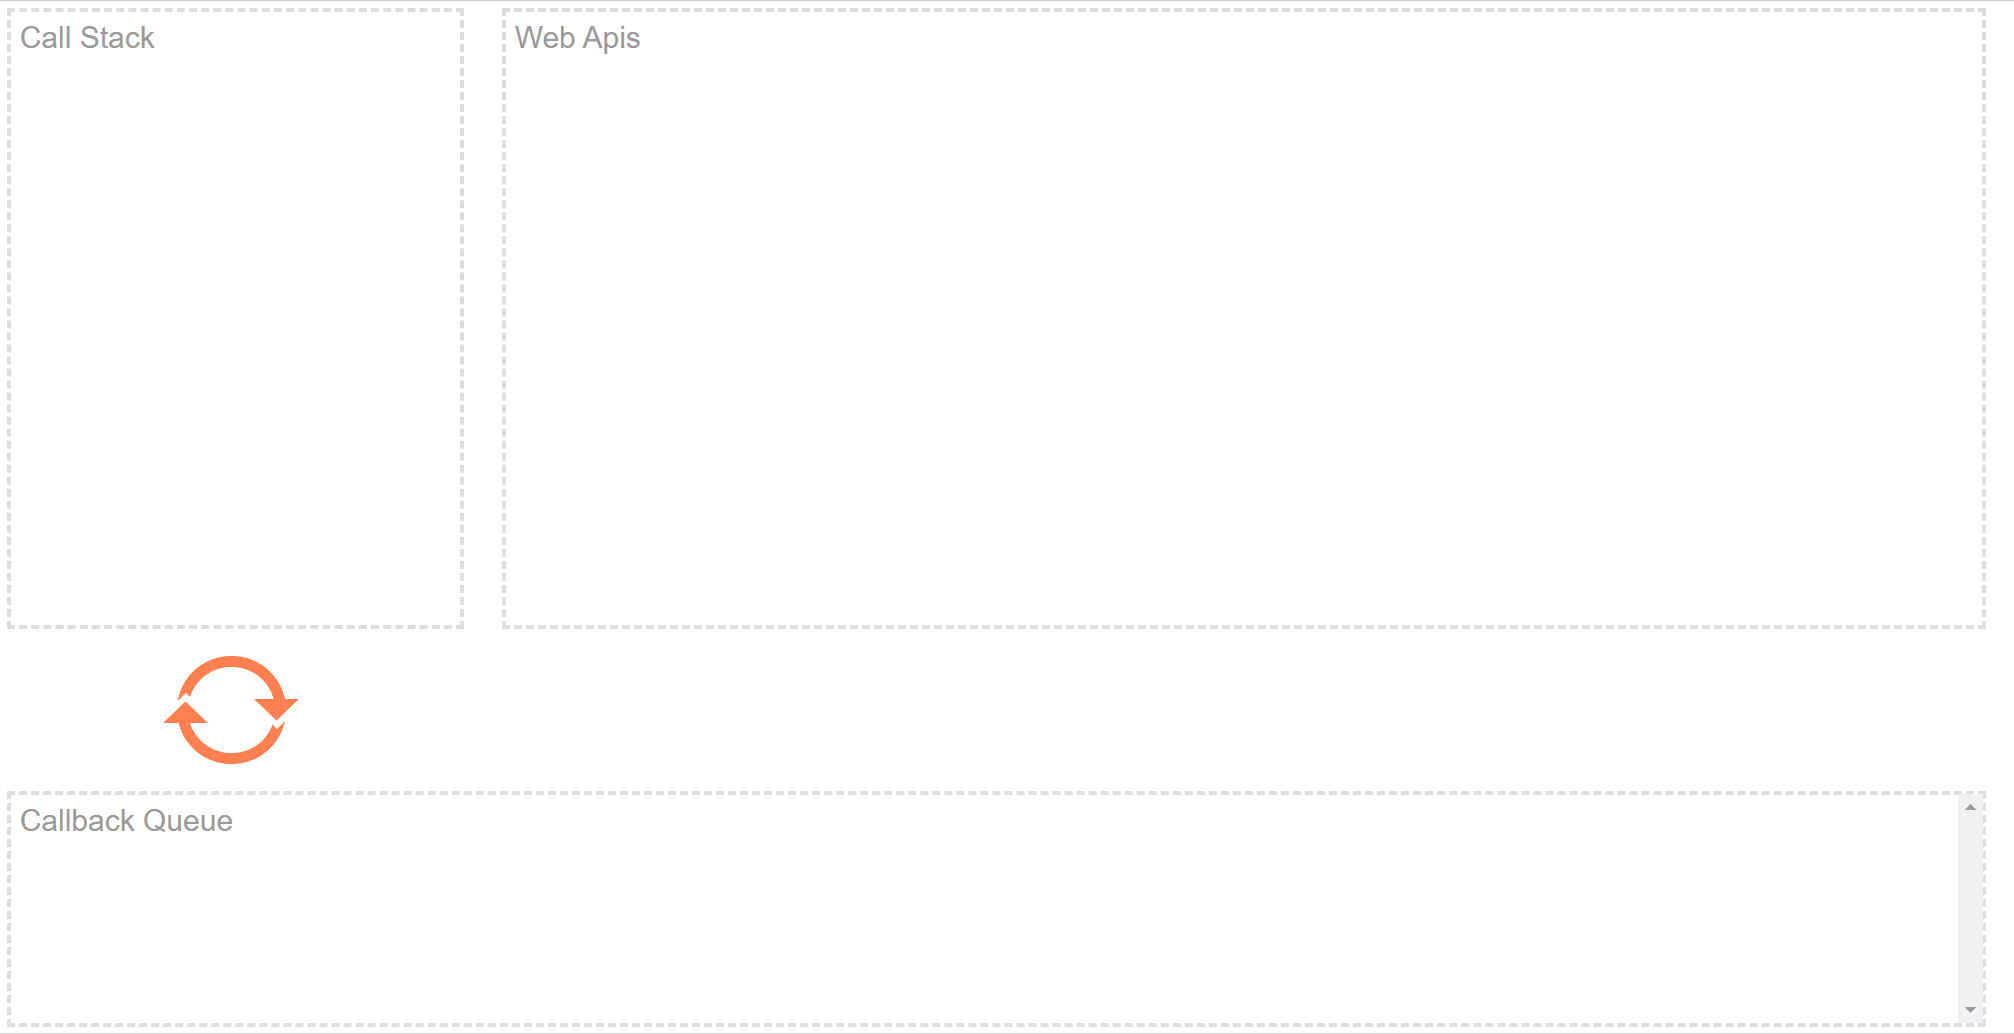
Event Queue
前面有說過瀏覽器除了有 JS Engine 外還有許多 Web API 可做應用,這些第三方 API 可以與 JS 一起執行,當遇到需要執行 call back 時,則會使用非同步模式,先將這些函式放到 Web APIs 中,在繼續執行主程式,等到時間到或是事件被觸發的時候,再把 call back 推送到 Event Queue(事件佇列) 中,等到整個 JS 執行環境結束後(Call Stack 清空),才依序呼叫 Event Queue 裡面的函式,採取先進先出 first in, first out (FIFO)。
// Say "Hello." console.log("Hello."); // Say "Goodbye" two seconds from now. setTimeout(function() { console.log("Goodbye!"); }, 2000); // Say "Hello again!" console.log("Hello again!");
greeting(); console.log(hello); // error: hello is not defined
使用 var 宣告的變數是以函式作為作用域的分界,範例中的 Christmas 宣告在函式之外所以視為全域作用範圍(global),而 hello 宣告在函式之內所以其作用範圍於該函數之內。當我們執行 greeting() 可以存取到 hello ,而在 function 外就無法獲得該變數內容,所以在全域範圍中會找不到 hello 而產生 ReferenceError 的錯誤。
var 變數可以重複宣告
JavaScript 允許重複宣告變數,不過實際上並不會進行重覆宣告,只會將其視為指派資料值:
1 2 3 4 5
var Christmas = 'Merry Christmas and happy New Year!' var Christmas; console.log(Christmas); // 'Merry Christmas and happy New Year!' var Christmas = 'We wish you a merry Christmas.' console.log(Christmas); // 'We wish you a merry Christmas.'
var 的問題
var 是以函式為變數作用域的分界,在一些使用了區塊語句: if , else , for , while 等等區塊語句中,使用 var 宣告的變數會曝露到全域作用範圍:
1 2 3 4 5 6 7 8 9 10
functiongreeting () { var hello = "greeting"; }
if(true){ var say = "Christmas time"; }
console.log(hello) // hello is not defined console.log(say) // 可存取
在 JavaScript 中,一個 Function 是不是建構式並不是取決於它的宣告方式,而是取決於它是不是用 new 來執行的。如果是用 new 執行一個 Function 時,我們就稱做這種呼叫為 建構式呼叫。當我們用建構式呼叫去執行一個 Function,這個 Function 就會被當作建構式。
使用 new 建構式呼叫的時候,實際上會有幾件事會被執行:
首先會新建出一個物件。
將物件的 .__proto__ 指向建構子的 prototype ,形成原型串鏈。
將建構子的 this 指向 new 出來的新物件。
回傳新建物件 ( 如果建構式本身沒有回傳東西的話 )。
先來看一下 function constructor 的實際應用,透過 function 的方式來建立一個新的物件,如果我們想要建立出同屬性名稱但不同屬性值的物件內容,我們可以把物件的屬性值變成參數,如此就能透過此 function constructor 建立出許多不同的物件:
// 利用含有 a 與 b 屬性的 f 函式,建立一個 o 物件:
let f = function () {
   this.a = 1;
   this.b = 2;
}
let o = new f(); // {a: 1, b: 2}

// 接著針對 f 函式的原型添加屬性
f.prototype.b = 3;
f.prototype.c = 4;

console.log(o.a); // 1
// o 有屬性「a」嗎?有,該數值為 1。

console.log(o.b); // 2
// o 有屬性「b」嗎?有,該數值為 2。
// o 還有個原型屬性「b」,但這裡沒有被訪問到。
// 這稱作「property shadowing」。

console.log(o.c); // 4
// o 有屬性「c」嗎?沒有,那就找 o 的原型看看。
// o 在「o.[[Prototype]]」有屬性「c」嗎?有,該數值為 4。

console.log(o.d); // undefined
// o 有屬性「d」嗎?沒有,那就找 o 的原型看看。
// o 在「o.[[Prototype]]」有屬性「d」嗎?沒有,那就找 o.[[Prototype]] 的原型看看。
// o 在「o.[[Prototype]].[[Prototype]]」是 null,停止搜尋。
// 找不到任何屬性,回傳 undefined。
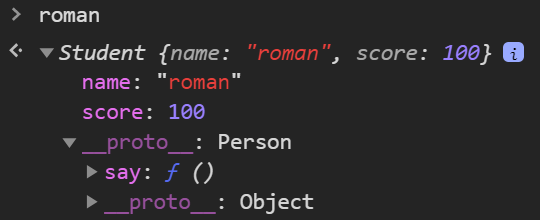
Person.prototype.log = function () { console.log(`Hi ${this.firstName}${this.lastName}`); }
var roman = new Person('Roman','Gonzalez', 18); roman.log(); // Hi Roman Gonzalez var bobby = new Person('Bobby','Lashley', 20); bobby.log(); // Hi Bobby Lashley
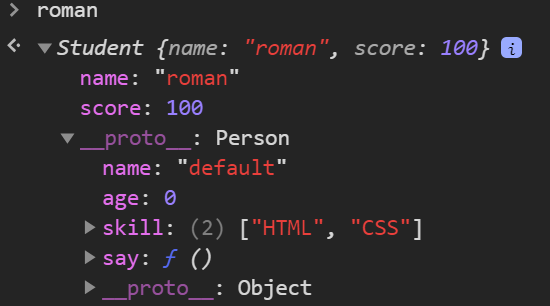
以上面 var roman = new Person(‘Roman’,’Gonzalez’, 18); 為例,當呼叫 roman.log() 方法,因為 roman 這個 instance 本身並沒有 log 這個 function,而 roman 是 Person 的 instance,所以如果在 roman 本身找不到,就會嘗試從 Person.prototype 去找。
var roman = new Person('Roman','Gonzalez', 18);
console.log(roman.hasOwnProperty('log')); // false
console.log(roman.__proto__.hasOwnProperty('log')); // true
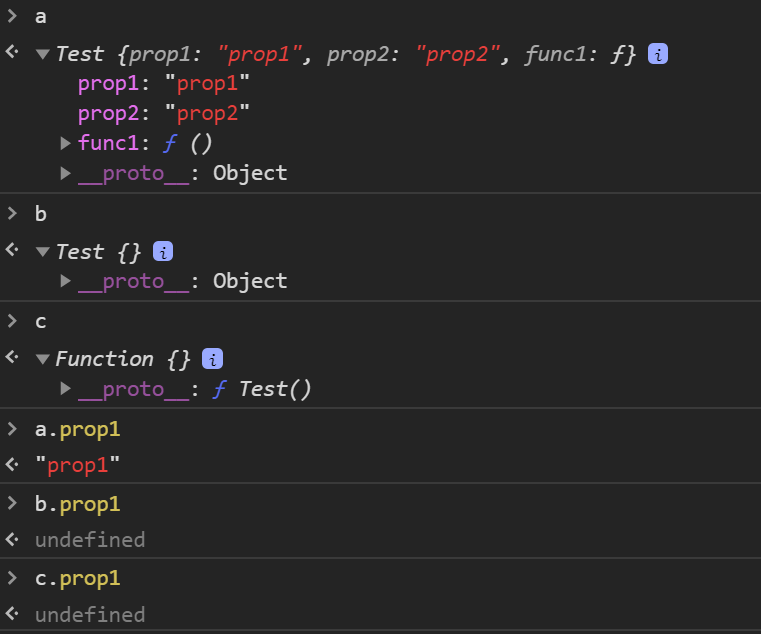
Test.prototype.protoProp1 = 'protoProp1'; Test.prototype.protoProp2 = 'protoProp2'; var newKeywordTest = new Test(); var objectCreateTest = Object.create(Test.prototype);